Morrigan Corset Planning 1

Another pretty intense make here, although unlike the crinoline I have at least made a corset before. The trickier thing is that this should be made of leather which I’ve never really used before. I also haven’t decided if I’m going to go with real leather or imitation. Imitation will be significantly cheaper (by at least a factor of 8 or so) and I wouldn’t have to worry about non-matching dye lots but real leather would be nicer and feel more correct.


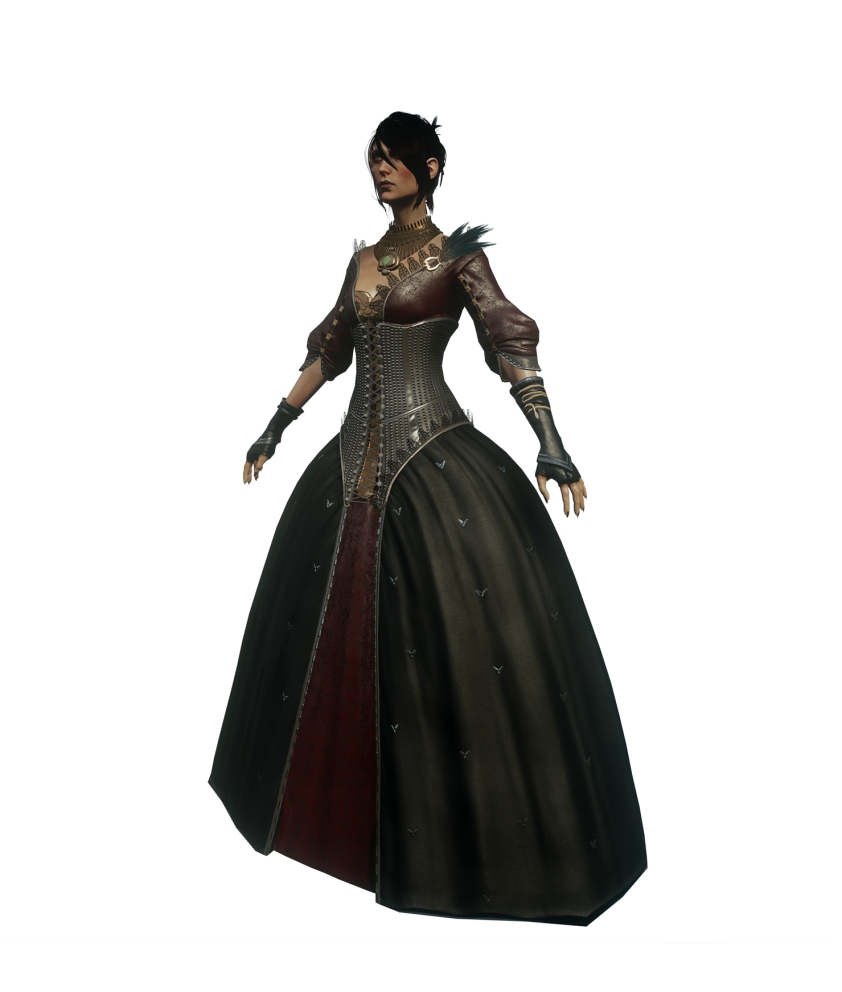
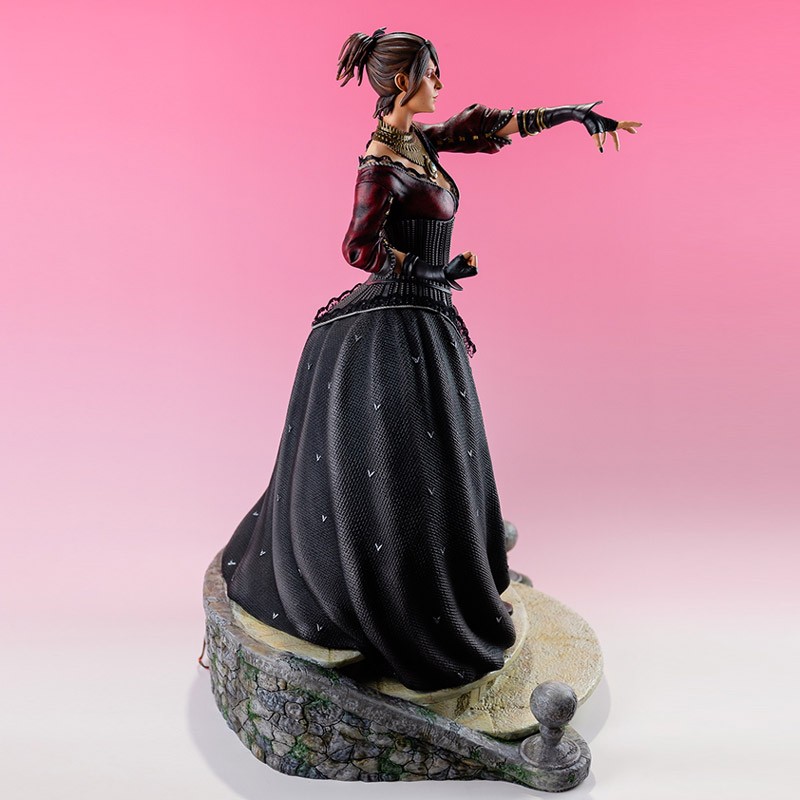
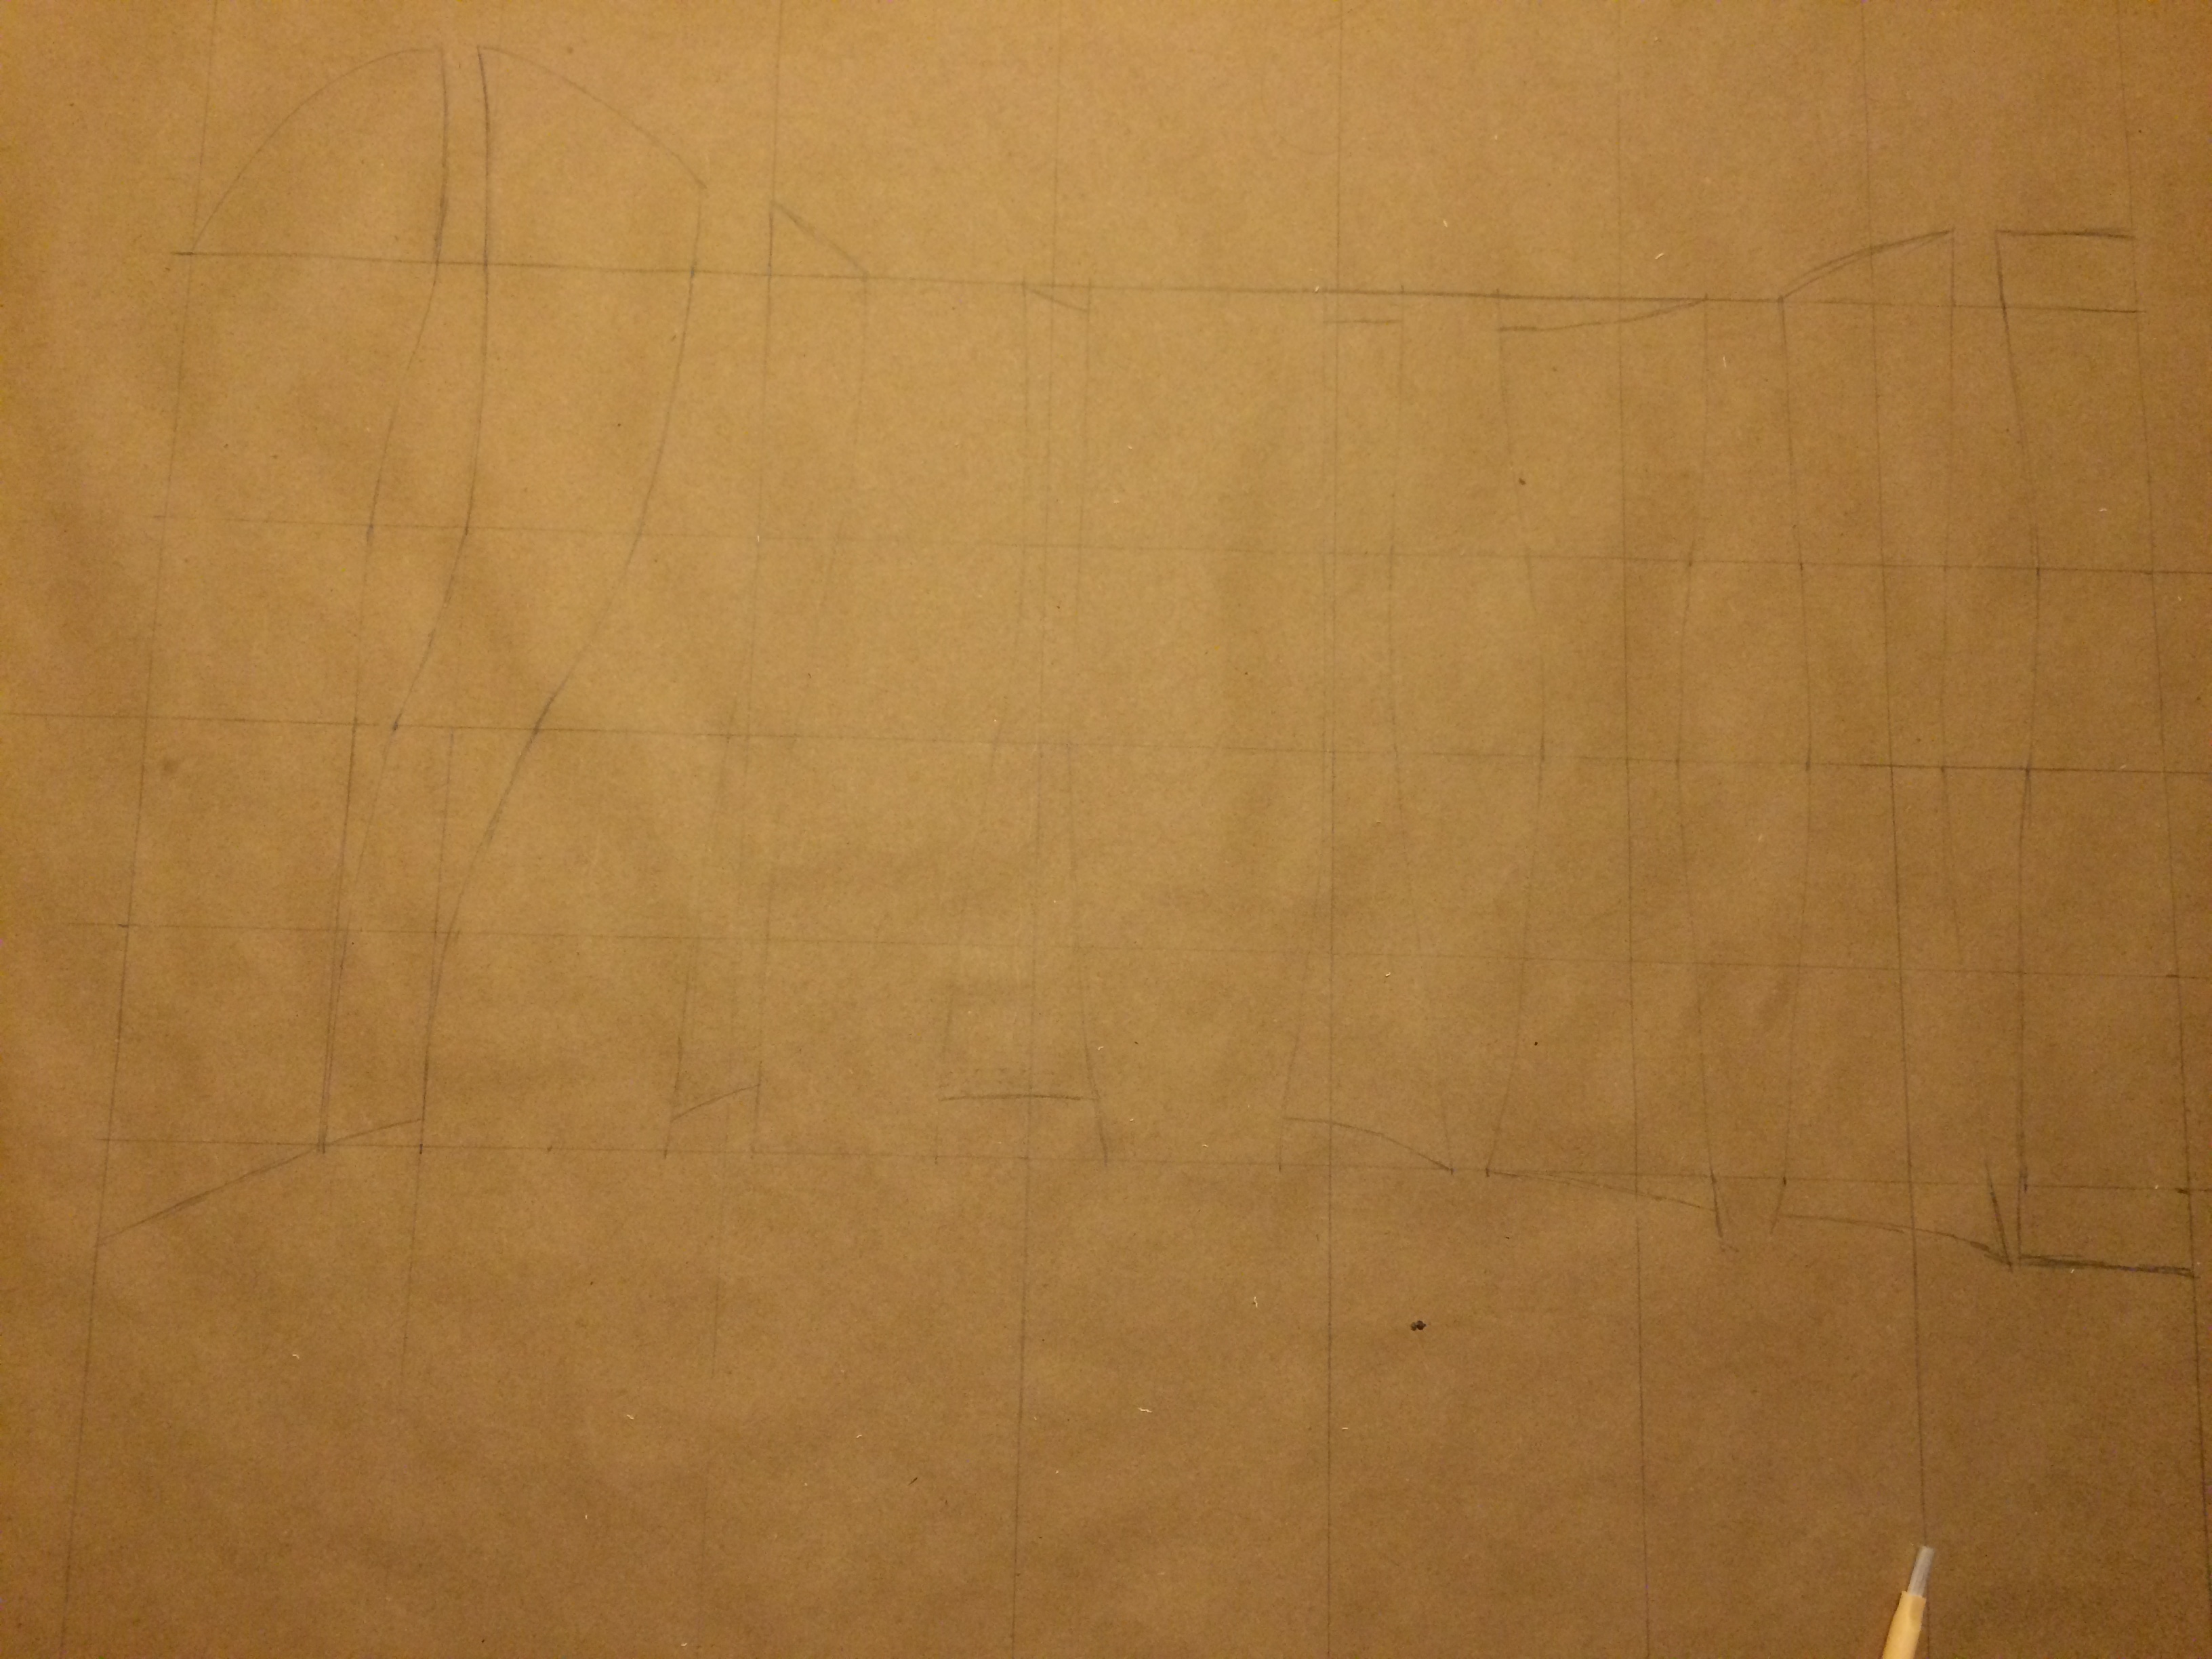
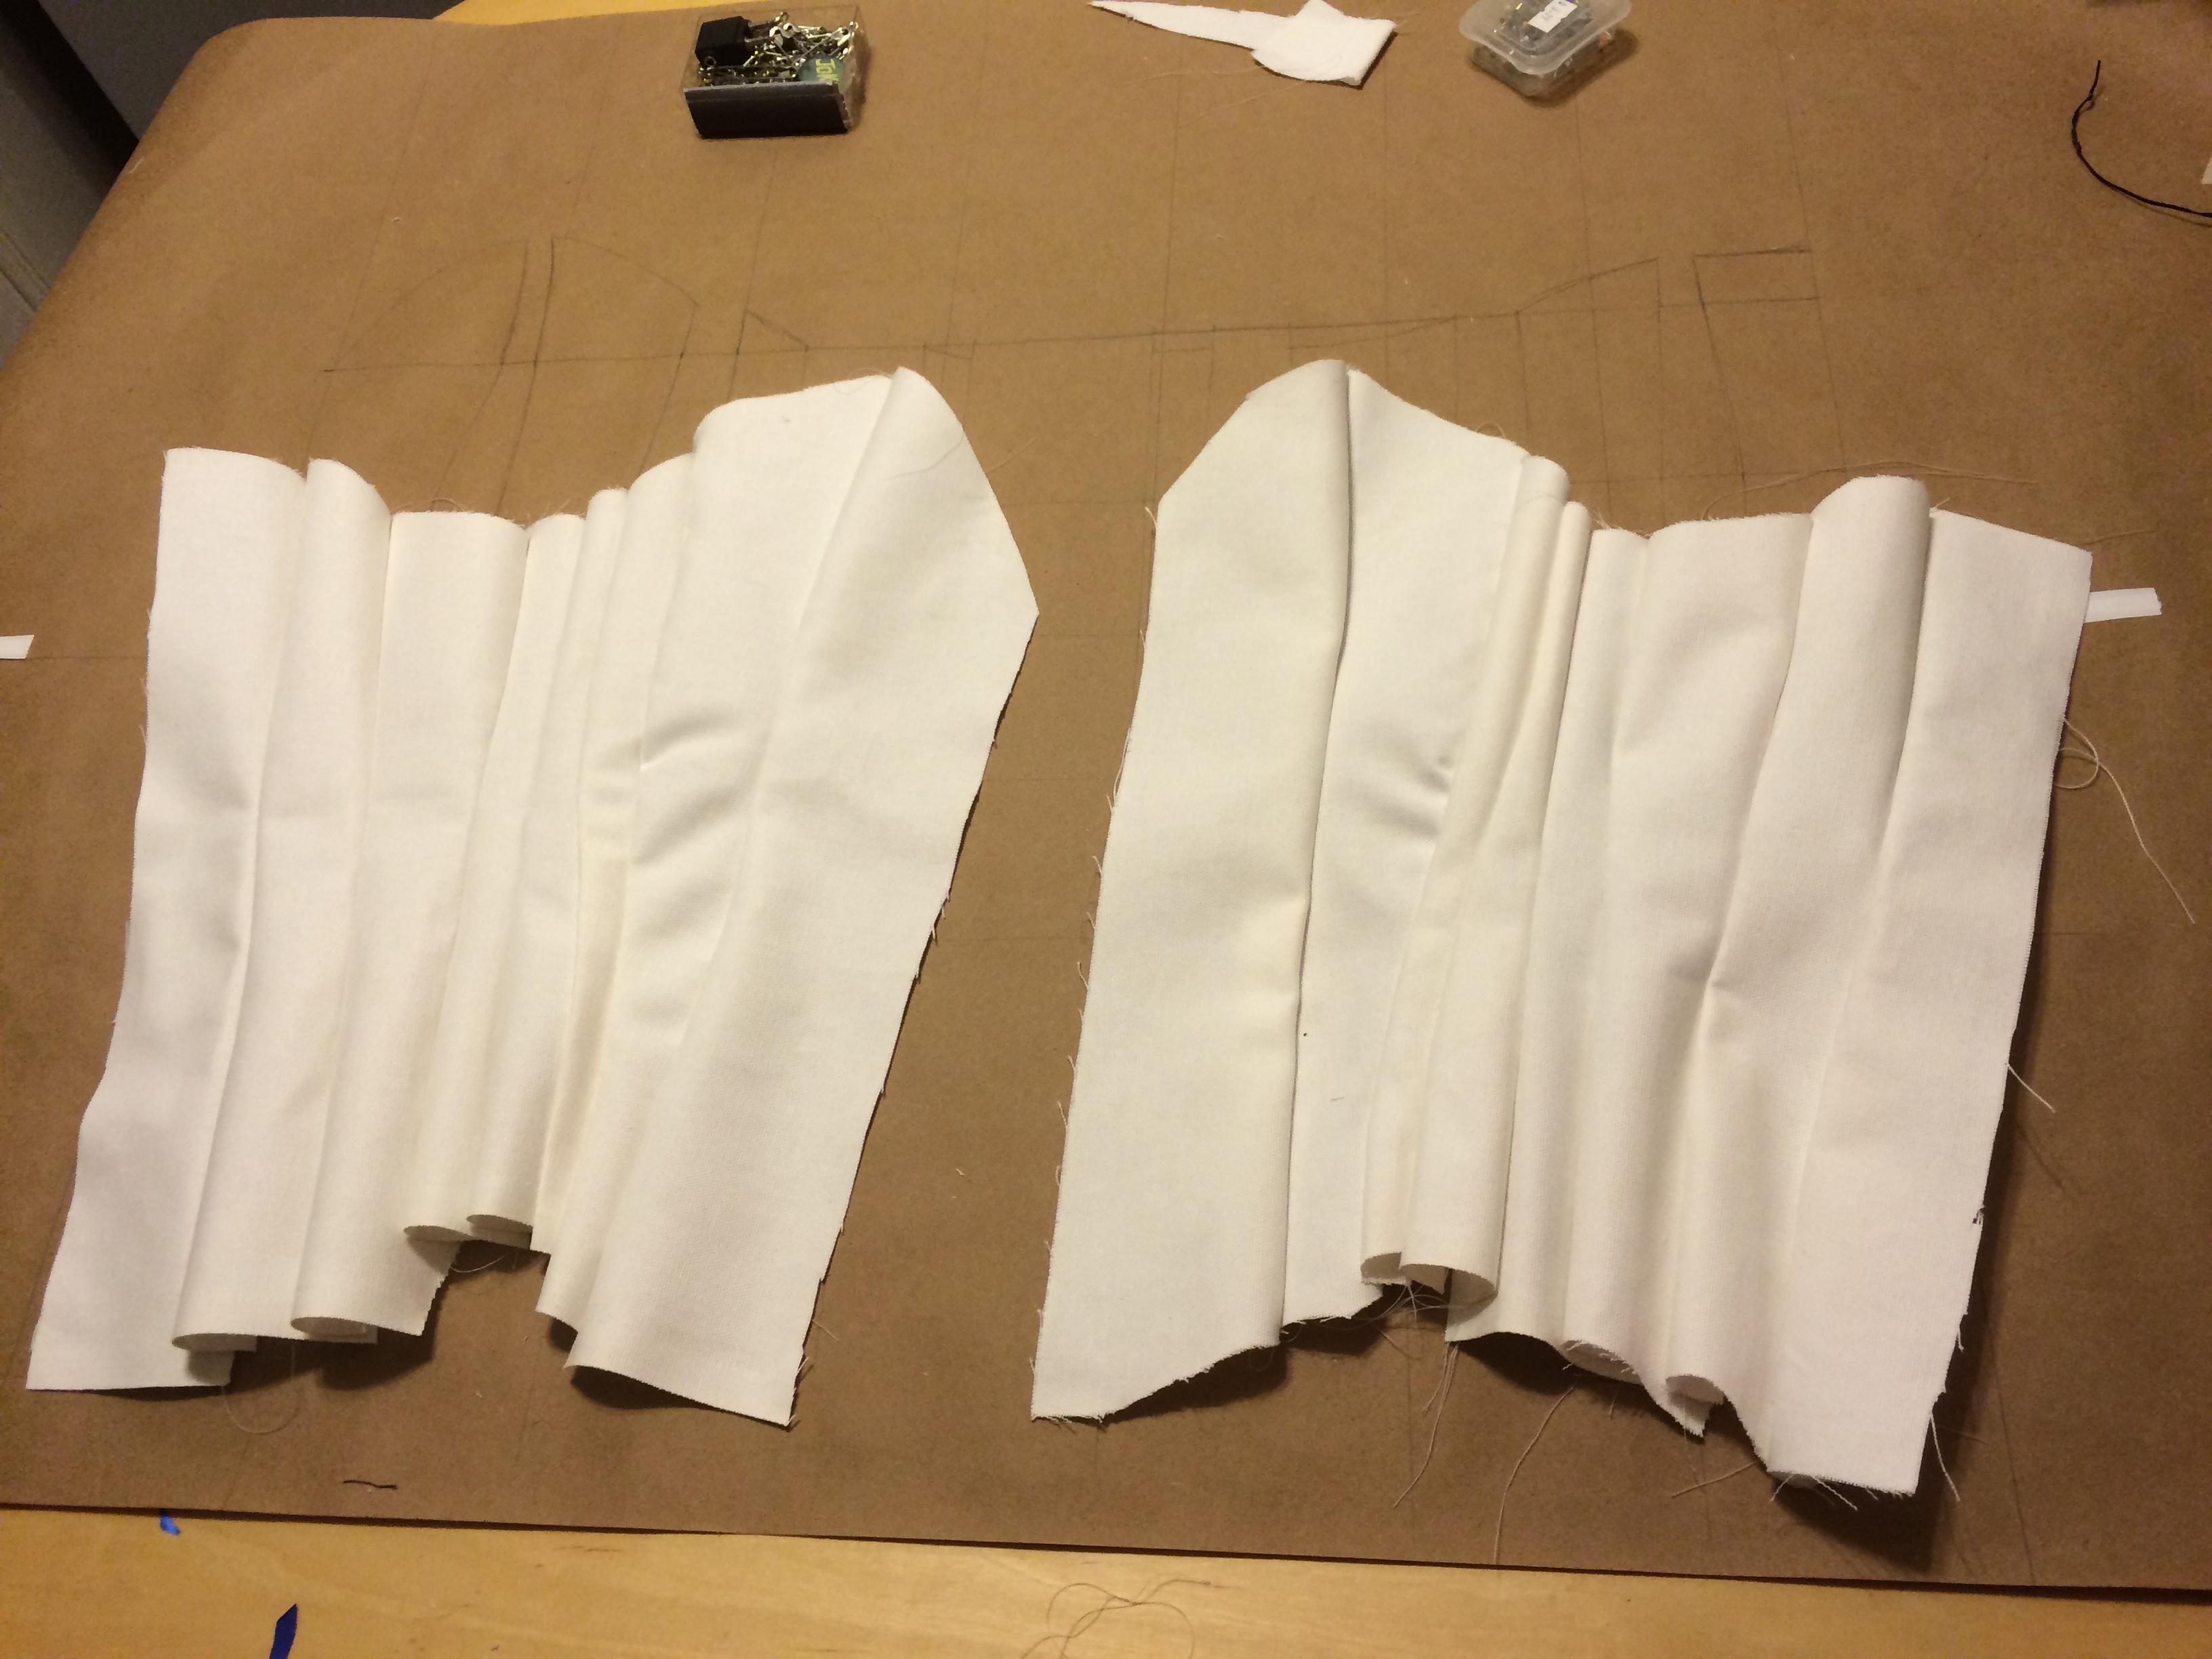
Pattern-wise I’m thinking of using this drafting method with a couple of inches taken out of centre front and added to centre back to allow for the closed back/front laced design. In one of those “games don’t have to worry about physics” issues, the front point seems too long to be able to actually sit down in so I’ll mess around with the mockup to see how long I can reasonably make it without impaling every chair I try to sit on. The back point should be less problematic as it doesn’t seem like it’s that long and it doesn’t go straight down but should push out over the skirt.

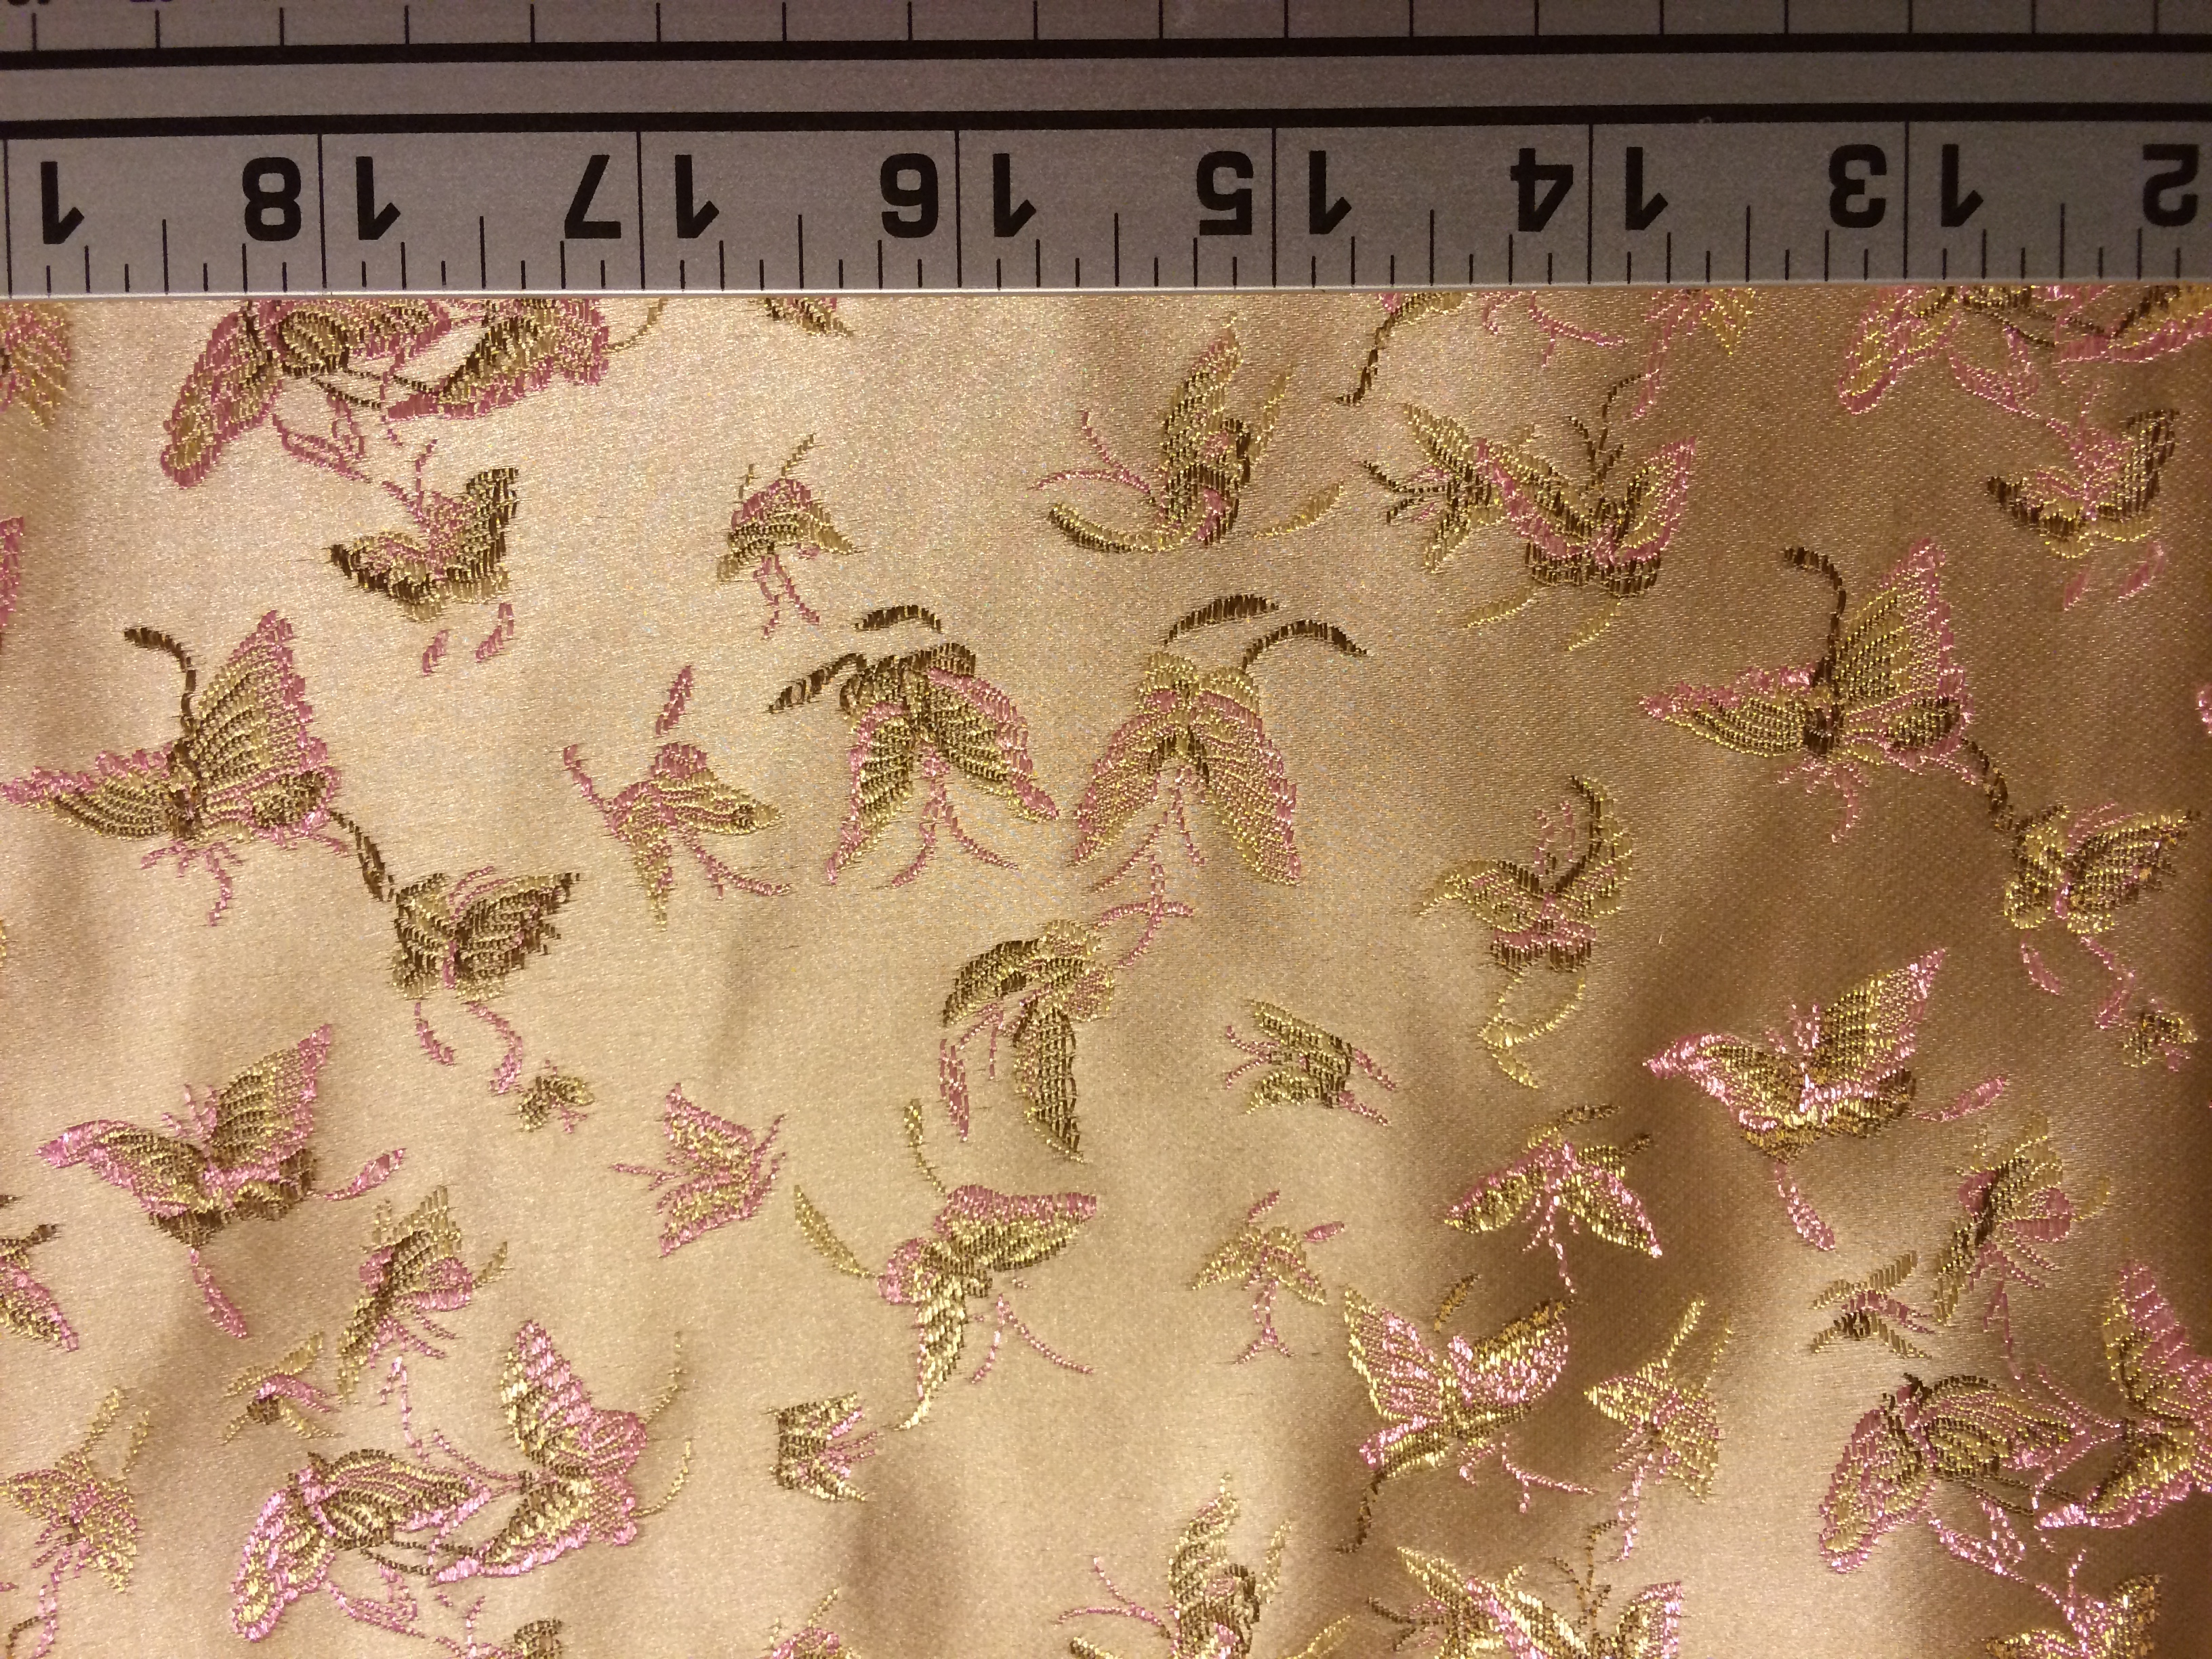
Construction-wise I think I’ll do 3 layers, an outer leather layer, middle strength layer and then an inner lining. I’d like to try using coutil for the strength layer just to see what it’s like but as with using real leather I’m not sure if this is the place to go that extra mile.

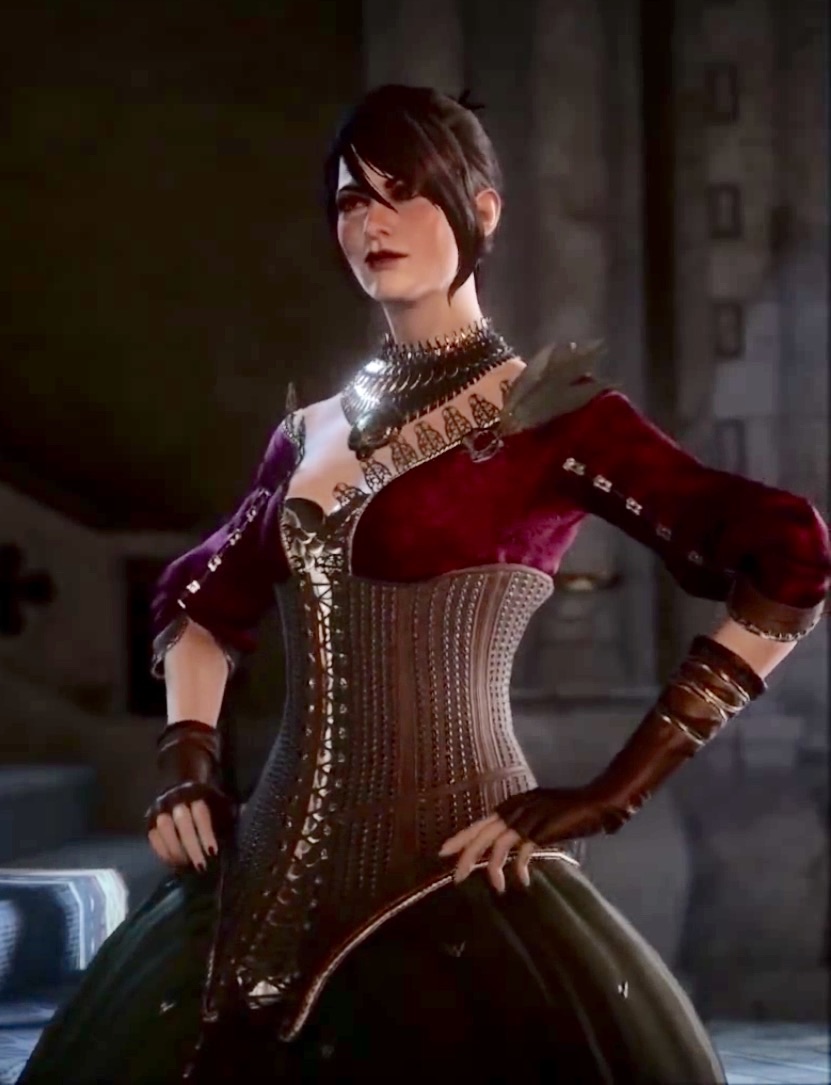
The next issues is the studs. Over and above how long it’s going to take to get all of them on there, is how do I get them on there. I could do spots, but those attach with prongs you have to bend down, and I’m a bit worried that if I don’t get every one down exactly right I end up stabbing myself. I’m planning on 2 layers of fabric in the corset behind the leather but still. And even if it doesn’t stab me I don’t want it wearing thorough the inner fabric either.leathespot

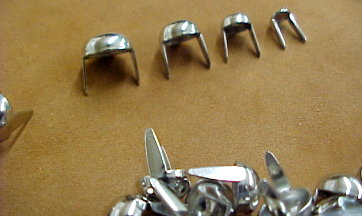
The other option is domed rivets but my worry with those is that the shank will be too long for just going through one layer of garment weight leather.

Last issue is the front lacing which doesn’t have grommets so much as mystery cup things.

Morrigancorset

I think I want to try using boot hooks for this which should give a similar effect and I think make it a bit easier to lace.


Morrigan Skirt Foundation Planning 1

So part of the reason I started writing these posts was to pin down some of the brainstorming I was doing on the various parts so that when I come back to the pieces after a week or so I’m not starting again every time I look at it. This means the stuff that’s going to show up more at this stage are the pieces that need a bit more thought. The parts where I already know how I’m going to approach the issue (skirt, bodice, gloves) are going to take less preparation than the parts where I need to learn a new skill or deal with the laws of physics in a way the game designers didn’t are going to need a bit more thought before I even get to the mock up stage.

With that in mind here’s me putting down some thoughts about how I’m going to make the skirt have the required shape. The main issue with this is that the skirt actually has a very unusual shape to it, being nearly flat in the front, but having a lot of fullness at the sides and back.

MorriganFront

This shows the large fullness at the sides

etc-statue-da-morrigan-sideright

The side view shows how the skirt falls almost straight down at the front, but has a lot of volume at the back.


Between the first picture and the obvious influence of the French court at Versailles over Orlesian design, I first thought that panniers were the way to go. They’d give me the shape I needed at the sides and would even be moderately realistic (for the costume of a witch in a fantasy land, sure, but realistic all the same). However, the more I looked at pictures, the more I realised that I needed some way of getting the back fullness in there.


Which is sort of where I hit a snag, because that sort of dress shape doesn’t really exist in Earth history. Side fullness is easy, per the panniers of late 17th/early 18th century fashions. Fullness all round is also pretty easy, via the early Victorian/American Civil War full hoop crinoline option. Fullness just at the back but not at the front or sides, totally doable with later Victorian bustle design. Fullness at the sides and back but not the front is just not really a thing. The closest I could find is the mid-Victorian elliptical crinoline, which fashion-wise was the transition from the full round hoop to the bustle. The problem I have with that is that patterns are hard to find and a significant proportion seem to loose the fullness at the sides to get a more truly elliptical shape, whereas I want a large “D” shape. I also want to aim for a more dome style top rather than the straight conical look that many of the hoop styles have.


So my current options are:

  • Try to make an elliptical crinoline with the shape I want.
  • Make an elliptical crinoline with the standard pattern and add padding to the sides to return side fullness.
  • Make panniers and use a bum roll and other padding to add back fullness.
  • Say screw it and just go for a round skirt with underlayers of net for fullness.

I’ve found an old pattern that seems like it should get me close to the shape I want, but it seems pretty work intensive for something that I’m not even sure if it will work. And of course I can’t make the pattern for the skirts (and thus finalize how much fabric I’ll need) until I’ve done it. But then this is my crazy pants costume, maybe I should just go ahead and do the crazy pants crinoline.


Morrigan Necklace Planning 1

MorriganNecklace

So this is a pretty intense creation. Lots of things going on, from huge focal thing to sticky up bits at the top. (Sub-goal, make it so the answer to the question”How did she die?” is not “Well she made a necklace with spikes directed at her throat and then nodded a bit too vigorously”)

This is just a primary planning post, working through some of the theoretical ideas to get some sort of scale for the project, so no mock ups or draughts yet just some maths.

Most other people who have made this costume have gone with making this out of plastic and spray painting it to give it the metallic look. This is probably the sane and cheap way to do it. However, I’ve never really used plastic before but I have done jewelry making before so I’m thinking about how I’d go about making this more traditionally.

Having said this, just stringing this would probably be problematic as the weight of the components would probably distort the shape. So I think making a fabric base that the pieces could be sewn to would help provide stability to the entire piece. Also it allows for the possibility of using an invisible separating zipper as the joining mechanism which would help provide the full coverage at the back.

Based on some very approximate measurements I made and guesstimating the proportions from the picture, the main part of the necklace will be about 4 inches long at the front, graduating to 2 inches at the side and back, with a circumference of 14 inches at the centre and 36 inches at the outside. The upright part will be 1 inch tall and have a circumference of 14 inches.

My original thought was to use all ready made beads and I found these which would be perfect for the smallest part of the main part. At 14mm wide I’d need about 36 to fill the distance. (Apologies for switching between metric and imperial, the tape measure I had on hand only had inches but the beads are sold in metric). Add to that another 36 to make the same distance around for the upright part and I’ll need about 80 of the scales. Strung together with some cylindrical spacers and jump rings and the first row is pretty straight forward.

Unfortunately for the larger components there isn’t really an existing product that will work so I think I’ll try cutting out the shapes from jeweler’s brass sheets. It should be thin enough that I can cut it with scissors and drill thorough it easily and for the most part I only need straight lines so shouldn’t need to do too much messing around with it.

So for the medium scales I’ll want them 14mm wide to match the size of the small scales and then about 50mm long. This should give enough room to lap underneath the small scales and still come down to about midway on the necklace. The medium circumference will be approximately 24 inches (720mm) so I’ll need about 52, which should fit on one 6″ x 12″ sheet.

For the long strips I’ll want them half as thick as the other scales so 7mm wide by about 70mm long, again to give enough length to lap underneath the other layers and to give the front the desired length. Obviously most of the strips will be shorter but if I make sure I’m allowing for the most possible now it should help avoid surprises further down the track. I’ll need about 136 to fit the largest circumference, which should require 2 6″ x 12″ sheets.

For the longer upright pieces I’ll want the at 7mm to match the long strips on the bottom, but only about 22mm tall (any more and the likelihood of impaling myself on my own jewelry goes way up).This will need another sheet 6″ x 12″ sheet.

Finally, the focal I think I will do out of polymer clay for shape, cover with metal leaf for finish and add a cabochon or focal bed for the centre.

So that’s the crazy pants plan for now, next step will be making a fabric mock up (nothing fancy, just a couple of large semi-circles) to get the shape and lay right, which I can then use to make a pattern for the fabric base layer, and to do a more accurate bead layout.


Halloween 2016 Early Planning

So as you can tell the plan didn’t work out so much, my pretty gold brocade coset is still in planning and the most crafty thing I’ve done since was last minute alterations on an old Belle costume for Halloween.

But with SDCC last week I’m feeling inspired to do something a bit more complex for Halloween this year. It seems super early to be thinking about it but I’m going to be on holiday for a couple of weeks in August and by the time I get back it’ll be basically September, which is 8 weekends to Halloween. It seems like a lot from this side but it vanishes with frightening rapidity as it gets closer to the deadline.

But even with plenty of planning I’m a bit worried about the time because when I say “a bit more complex” my crazy-pants brain says “hey why not super complex” and so my goal is to have a full Dragon Age Inquisition Morrigan Ballgown by October 29th.

Morrigandai

So from the top I’m going to need:

  • Black wig with feather accessory
  • Crazy necklace collar – 1
  • Burgundy brocade bodice with lace trim, gold scale centre and leather cuffs.
  • Feathered brooch
  • Studded leather underbust corset with lace trim
  • Fingerless leather gloves with snake cuff bangle on the right.
  • Black/forest green velvet overskirt with beaded trim and silver fly embellishments
  • Burgundy brocade underskirt
  • Some sort of structured undergarment to get the weird skirt shape. 1
  • Flat buckled leather boots.

Now figuring out some of this will be much easier thanks to the lovely people at Bioware who posted this guide with lots of detailed renders to help figure out some of the intricacies that usually require lots of image searches and screen shots. In addition to the hosted pics they also have a downloadable pdf which contains colour swatches and design samples.

I’ll post more about the various components separately and hopefully have a wrap up post here in 3 months time.


Overbust Corset – Part 1

This started out of a combination of boredom, a desire to work on some corset making skills and a desire to make use of a pretty gold and pink brocade fabric I bought as a remnant a few years back.

GoldButterflyBrocade

I made my first corset for my costume for halloween just gone, part of a steampunk Dorothy outfit. It came out pretty good but there’s always room for improvement.

Steampunk Dorothy Costume

Steampunk Dorothy Costume

The first corset was designed to go over an undershirt so I didn’t do a lining on it (just two layers of duck canvas core and a top decorative layer) and it the top of the neckline went straight across the bustline. For the new one, which will be a stand alone piece of outerwear I wanted to go for a much higher sweetheart neckline, fully line the corset and make a lacing panel for the back.

So that’s the plan but it’s a long way down the line.

Step 1 was drafting the pattern. The pattern I used was this one. Sidney Eileen is a great resource for beginner corset makers and the method I’ll be using is entirely hers.

Next step was adjusting the pattern to my measurements, for which I used the method here. I have a feeling I’m going to need to make some changes to the pattern so for the first mock up I traced the pattern from the draft.

First Pattern Draft

I started this a few weeks back so I had already drafted out the pattern and cut out a mock up from some plain white duck canvas. This weekend’s project was putting together the mock up, which I’ve almost completed. I just need to add a zip to the front for a mock up busk, add some grommets at the back  for lacing and it will be ready for the first fitting. Progress 🙂

Mock up 1

The Plan

I normally do crafty things for a specific event or occasion, but I decided I wanted to make more of an effort to do things more regularly, partly to keep busy and partly to break out of the cycle of manic activity before an event then crushing boredom after.

I also decided I wanted to start a blog about it so I’d have some record of how I go about doing things so I can start having some semblance of repeatability for what I make.

I’ll be keeping a list of planned and ongoing projects so my flashes of inspiration don’t disappear into the ether.

The goals

1. Always have at least one project going.

2. Make some progress on at least one project each weekend.

3. Write about it.

Current Projects

1. Overbust corset

2. Workstation

3. Sundress

ETA: Given how this first post looks, I think that #4 needs to be figure out how to use wordpress to make this look pretty (or at least less horrible).